Sunday, September 25, 2011

Read and write Excel data with PHP to MySQL - Using XML support


Microsoft Office 2003 for the Microsoft Windows® operating system opened a whole new set of opportunities that non-Microsoft engineers have yet to realize. Of course, you had the usual set of new features. But the big new advance was the addition of XML file formats. With Office 2003, you can save your Microsoft Excel spreadsheet as XML and use the file just as you would the binary equivalent. The same goes for Microsoft Word.
Why are XML file formats so important? Because for years, the true power of Excel or Word was locked in binary file formats that required elaborate converters to access. Now, you can read or write Excel or Word files using XML tools like Extensible Stylesheet Language Transformation (XSLT) or the XML Document Object Model (DOM) functions built into the PHP programming language.
In this article, I show how to build a PHP Web application that uses these formats to read data into a database from an Excel spreadsheet and to export the contents of a database table to an Excel spreadsheet.
For this article, I use a simple Web application so you can clearly see the Excel XML mechanism. This application is a table of names and e-mail addresses.
The schema in MySQL syntax looks like the code in Listing 1.

Listing 1. SQL for the database
                
DROP TABLE IF EXISTS names;
CREATE TABLE names (
	id INT NOT NULL AUTO_INCREMENT,
	first TEXT,
	middle TEXT,
	last TEXT,
	email TEXT,
	PRIMARY KEY( id )
);

This file is a single-table database in which the table -- names -- has five fields: an auto-incrementing ID field, followed by first, middle, and last name fields, and an e-mail field.
To set up the database, create the database using the Mysqladmin command-line tool: mysqladmin --user=root create names. You then load the database from the schema file: mysql --user=root names < schema.sql. The user and password authentication you use varies depending on your installation, but the idea remains the same. First, create the database. Then use the SQL file to create the tables with the required fields.
The next step is to create some data for import. Create a new Excel file. In the first workbook, call the top row of columns First,MiddleLast, and Email. Then, add a few rows of data to the list (see Figure 1).

Figure 1. Data for import 
Data for import
You can make the list as long as you like or change the fields however you see fit. The PHP import script in this article ignores the first line of data unconditionally, because it assumes that it's the header line. In a production application, you would probably want to read and parse the header line to determine which fields are in which columns and make the appropriate changes to your import logic.
The last step is to save the file as XML by clicking File > Save As and then, in the Save As window, selecting XML Spreadsheetfrom the Save as type drop-down list (see Figure 2).

Figure 2. Save the file as an XML spreadsheet 
Save file as XML spreadsheet
With the XML file in hand, you can begin to develop your PHP application.
The import system starts easily enough with a page in which you specify the input Excel XML file (see Figure 3).

Figure 3. Specify the input Excel XML file
Specify input Excel XML file
The page logic is simple, as shown in Listing 2:

Listing 2. The upload page code


Names file:

I've named the file with a .php extension, but it's really not PHP at all. It's just an HTML file that allows the user to specify a file and submits that file to the import.php page, which is where the real fun occurs.
To make it a little easier to follow, I've written the import.php page in two phases. In the first phase, I simply parse the XML data and output it as a table. In the second phase, I add the logic that inserts the records into the database.
Listing 3 shows an example Excel 2003 XML file.

Listing 3. Sample Excel XML file


  Jack Herrington
  Jack Herrington
  2005-08-02T04:06:26Z
  2005-08-02T04:30:11Z
  My Software Company, Inc.
  11.6360
  
  
  8535
  12345
  480
  90
  False
  False


  First
  Middle
  Last
  Email
  
  
  Molly
  Katzen
  
  molly@katzen.com
  
  ...
  
300 300 3 5 False False
False False False False

I've chopped out a couple of rows in the middle, but otherwise, the file is verbatim what comes out of Excel. It's relatively clean XML. Note the document header portion at the beginning that describes the document and who is writing it, lays down some visual information, lists styles, an so on. Then, the data comes as a set of worksheets within the main Workbook object.
The first Worksheet object contains the real data. Within that object, the data resides inside the Table tag in a set of Row andCell tags. Each Cell tag has a Data tag associated with it that holds the data for the cell. In this case, the data is always formatted as String type.
By default, when you create a new document, Excel creates three worksheets named Sheet1Sheet2, and Sheet3. I didn't delete the second and third worksheets, so you see these empty workbooks at the end of the document.
Listing 4 shows the first version of the import.php script.

Listing 4. The first version of the import script
                
   $first,
  'middle' => $middle,
  'last' => $last,
  'email' => $email 
  );
  }
  
  if ( $_FILES['file']['tmp_name'] )
  {
  $dom = DOMDocument::load( $_FILES['file']['tmp_name'] );
  $rows = $dom->getElementsByTagName( 'Row' );
  $first_row = true;
  foreach ($rows as $row)
  {
  if ( !$first_row )
  {
  $first = "";
  $middle = "";
  $last = "";
  $email = "";
  
  $index = 1;
  $cells = $row->getElementsByTagName( 'Cell' );
  foreach( $cells as $cell )
  { 
  $ind = $cell->getAttribute( 'Index' );
  if ( $ind != null ) $index = $ind;
  
  if ( $index == 1 ) $first = $cell->nodeValue;
  if ( $index == 2 ) $middle = $cell->nodeValue;
  if ( $index == 3 ) $last = $cell->nodeValue;
  if ( $index == 4 ) $email = $cell->nodeValue;
  
  $index += 1;
  }
  add_person( $first, $middle, $last, $email );
  }
  $first_row = false;
  }
  }
  ?>


First Middle Last Email

The script starts by reading in the uploaded temporary file into a DOMDocument object. Then the script finds each Row tag. The first row is ignored using the logic associated with the $first_row variable. After the first row, an inside loop parses each Celltag within the row.
The next tricky bit is to figure out which column you're in. As you can see in the XML, the Cell tag doesn't specify the row or column number. The script needs to keep track of that itself. Actually, it's a bit more complicated than that, even. In fact, the Celltag has an ss:Index attribute that tells you what column the cell is on if there are blank columns in this row. That's what thegetAttribute('index') code is looking for.
After determining the index, the code is simple. Place the cell value into a local value associated with that field. Then, at the end of the row, call the add_person function to add the person to the data set.
At the end of the page, the PHP outputs the data that was found into an HTML table using familiar PHP mechanisms (see Figure 4).

Figure 4. Data output into an HTML table
Data output into an HTML table
The next step is to load this data into the database.
After the script has the row data in a PHP data structure, it needs to add that data to the database. To do that, I've added some code that uses the Pear DB module (see Listing 5).

Listing 5. The second version of the import script
                
getMessage()); }

function add_person( $first, $middle, $last, $email )
{
 global $data, $db;

 $sth = $db->prepare( "INSERT INTO names VALUES( 0, ?, ?, ?, ? )" );
 $db->execute( $sth, array( $first, $middle, $last, $email ) );

 $data []= array(
   'first' => $first,
   'middle' => $middle,
   'last' => $last,
   'email' => $email
 );
}

if ( $_FILES['file']['tmp_name'] )
{
 $dom = DOMDocument::load( $_FILES['file']['tmp_name'] );
 $rows = $dom->getElementsByTagName( 'Row' );
 $first_row = true;
 foreach ($rows as $row)
 {
   if ( !$first_row )
   {
     $first = "";
     $middle = "";
     $last = "";
     $email = "";

     $index = 1;
     $cells = $row->getElementsByTagName( 'Cell' );
     foreach( $cells as $cell )
     {
       $ind = $cell->getAttribute( 'Index' );
       if ( $ind != null ) $index = $ind;

       if ( $index == 1 ) $first = $cell->nodeValue;
       if ( $index == 2 ) $middle = $cell->nodeValue;
       if ( $index == 3 ) $last = $cell->nodeValue;
       if ( $index == 4 ) $email = $cell->nodeValue;

       $index += 1;
     }
     add_person( $first, $middle, $last, $email );
   }
   $first_row = false;
 }
}
?>


These records have been added to the database:
<
<
<
<
First Middle Last Email
Click here for the entire table.

Figure 5 shows the output in Firefox.

Figure 5. The database
The database
It's not much on looks, but that's not the point. The point is that through use of the database object's prepare and executestatements, you can add the data into the database. To prove it, I've created another page called list.php that shows the data in the database (see Listing 6).

Listing 6. List.php
                
  getMessage()); }
  
  $res = $db->query( "SELECT * FROM names ORDER BY last" );
  ?>
  
  
  fetchInto( $row, 
            DB_FETCHMODE_ASSOC ) ) { ?>
  
ID First Middle Last Email
Download as an Excel spreadsheet.

This simple page starts by executing a SQL select operation against the names table. Then it creates a table and adds every row in the table to it using the fetchInto method to get the row data.
Figure 6 shows the output of the page.

Figure 6. Output from list.php
Output from list.php
Again, not a beauty contest winner, but with this page, I have explained the basics of how to get to the data into the database. That, in turn, provides the basis for the script that will generate the Excel XML file for export.
The final step is to generate the Excel XML. For me, that started with copying the Excel XML into a PHP script (see Listing 7). I know that's lazy, but it's the easiest way to get to an Excel XML file that parses properly. (Excel is picky about its XML.)

Listing 7. The XML export page
                
  getMessage()); }
  
  $res = $db->query( "SELECT * FROM names ORDER BY last" );
  
  $rows = array();
  while( $res->fetchInto( $row, DB_FETCHMODE_ASSOC ) ) 
  { $rows []= $row; }
  print "\n";
  print "\n";
  ?>
  
  
 Jack Herrington
  Jack Herrington
  2005-08-02T04:06:26Z
  2005-08-02T04:30:11Z
  My Company, Inc.
  11.6360
  
  
  8535
  12345
  480
  90
  False
  False


  First
  Middle
  Last
  Email


300 300 3 1 False False

The script starts with setting the content type of the output to XML. That's important because browsers will think this code is simply bad HTML otherwise.
I've changed the SQL query portion of the code to save the results of the query into an array. Typically, I wouldn't do that with this type of report page, but in this case, I need to put the number of rows, plus one, into the ss:ExpandedRowCount attribute. Theplus one is to account for the header row.
Figure 7 shows the result of clicking the link.

Figure 7. The export XML in Firefox
Export XML in Firefox
Not terribly impressive. But look what happens when I click the same link in Internet Explorer (see Figure 8):

Figure 8. The exported XML in Internet Explorer
Exported XML in Internet Explorer
What a difference. This is a full spreadsheet -- formatting and all right -- inside the browser. (Of course, in Firefox, you can right-click the link, save the XML to a file, and launch it that way.)
As with anything on the bleeding edge, this technique has some pitfalls. For example, it doesn't work on Macintosh yet because the latest Office for Mac version doesn't support XML files.
Another hitch is that debugging these files can be a problem. If the XML is even slightly wrong, the embedded Excel object get into a kind of bad state in which Excel already thinks it's running and refuses to launch. This can only be fixed only by restarting the application.
That said, this technique does offer unparalleled integration possibilities for PHP programmers. How often do you find that the source of the data is in something like Excel or Word and needs to be hand-migrated -- cell by cell or paragraph by paragraph -- into a Web application? With import technology like this, the problem is solved. You can read the data directly from the worksheets or document.
The same can be said of the export side. HTML is great for articles and papers, but was never designed to render spreadsheet information properly. With the techniques shown here, you can generate a spreadsheet -- formulae, formatting, and all -- in a way users expect to see it.

Source : http://www.ibm.com/developerworks/opensource/library/os-phpexcel/

20 Ways to Drive More Traffic to Your Website and Blog


Increasing traffic to our website and/or blog can be a full-time job. But it doesn't have to be. If you understand a few simple principles before implementing Search Engine Marketing (SEM), you'll save time and build a strong and steady stream of traffic to your website.
First, it's important to know how search engines like Google rank you and measure traffic online.
Page Rank: Google Page Rank, or GPR, is a number (between 1-10) that Google assigns to a website to indicate importance. The higher the page rank, the more important the site is. Sites like MSNBC have a high page rank, often 9 or 10. Niche sites are lower. Our site is between a 4 and 5. If you're targeting sites for incoming links, make sure their GPR is high enough to matter. Not sure what it should be? Google your keyword and identify sites in your market. The top 5 to 10 sites will tell you what page rank you should seek.
Google's System: Google ranks websites using two methods: Relevance and authority. Relevance means relevance to the search. Authority is different and critical if you want more traffic for your website.
Authority is how important Google determines your site is and depends not just on the content of your site, but the types of sites that link to you. If your site has 1,000 incoming links from sites with low GPR, you won't get much authority from Google. Conversely, if you want incoming links you should pursue higher targeted sites and get fewer of them. When I started blogging for Huffington Post, which has a GPR of 8, I found that our GPR 4/5 site benefited from the inbound link the column provided.
Since the majority of us search through Google, understanding the intricacies of this massive search engine is vital to getting better results. Let's look at some smart SEO tactics for getting website traffic:
Your website:
  1. Social content: Have something "social" on your site, whether it's a blog, forum or even social networking. The easiest and best of these is a blog.
  2. Update often: Always provide fresh content. This helps your rank. What's the best way to add fresh content to your site? A blog is often the quickest means.
  3. Social media tools: Learn how to effectively use sites like Facebook and Twitter. To expert SEO people, they are considered "feeder sites," meaning they can feed a lot of traffic to your website. My recommendation: use your Fan Page to promote your work and leave the profile for your personal life.
  4. Keywords: The term "keywords" often conjures up the idea that hours of research are involved to find the perfect keywords for your site. Even if you can only invest an hour, it's well worth it. The quickest way to determine the right keywords for your site is via Google's keyword tool: http://www.googlekeywordtool.com. You'll want to plug in your topic and see how people search on it. The keywords they use are valuable to you.
  5. Ranking for a particular keyword: Many of us want to rank higher for a particular keyword or phrase. Here's a little-known SEO secret for better ranking: after you determine what keywords you want to rank for, use them in your URL, YouTube channel if you have one, as your Facebook Page name and even for your Twitter account. It's likely the search term you want to rank for won't be available in any of these properties so you'll have to be creative. Here's what we did: Back in August 2010 I had our website redesigned. I wanted to rank for Book Marketing. The results for our site were OK, but often we would show up on Page two of Google. I bought the URL bookmarketingAME.com because bookmarketing.com wasn't available. Why bookmarketingame.com? Whatever you tack onto the end of your keyword URL doesn't matter and AME are the initials of my company. Using your name or some other branding at the end of the URL is fine, what matters is the first word or words. When I did that (and I renamed our Facebook Page and YouTube channel too, but not my Twitter account because so many people associate me with @bookgal) I found that within three months, our site went from Page two to Page one of Google, often sitting in the #3 position. Did it help with traffic? You bet it did.
  6. Words on your website: Once you've identified keywords, use them on your site. Make sure they are on your home page specifically because that's the page Google sees and shows in searches.
  7. Video: If you're not shy, a great speaker and have an interesting story to tell or great tips for your audience, consider getting a YouTube channel. It's a fantastic way to drive traffic to your site.
  8. Page titles: Page titles are the words that show up in the top frame of your browser, above the search bar. Most of us forget to give our page titles a name and when Google reads them, it sees things like "home page," which is the least descriptive phrase you can use. Use your keywords in your page titles and be sure to title each page of your site.
  9. Blog commenting: This is a powerful tool that we've been using for years. Few realize the benefits blog commenting can bring to a site. Identify the top 5 to 10 blogs in your market and follow them. When there's a post you like or something you want to say, post a comment. When you sign into the blog you should include your URL, this is an incoming link from that blog to your site, which will help you with your ranking, authority, and traffic.
  10. Identify your competition: If you want incoming links, see who's linking to your competition. How do you search for incoming links? Pop the following into your Google search box: linkdomain:www.website.com.
Blog:
  1. Own your blog: Whether you have just a blog, or the blog is part of your website, you need to own it. That means your blog is hosted where your site is hosted. Instead of a domain name that reads: www.wordpress.nameofblog.com it says: www.yoursite.com/blog. You should do this because the benefits to your site from an active blog are enormous. If your blog is sitting on a Wordpress site, only Wordpress benefits from your hard work. You want the ranking and incoming links that a blog can provide.
  2. Blog frequently: I recommend a minimum of twice weekly. Your blogs don't have to be long; in fact, some of my blogs are no more than fifty words.
  3. Share and share alike: If you don't have sharing widgets on your site (Upload to Facebook, Tweet This!, etc.) then have your designer add it to the site asap. Most blogging software includes these widgets.
  4. Get social: To generate a lot of traffic we syndicate our blog to sites like Facebook and Twitter. Running feeds is easy. I ran my Twitter feed through SocialOomph.com and then linked it to Facebook. When I blog, it automatically feeds the post through Twitter and then Twitter feeds it to Facebook. Am I worried about too much duplicate content? Not really. I think people enter your message through different doors. The people who find you on Twitter may not be the same people who Like your page on Facebook.
  5. Use Anchor Text: This is the hyperlinked text that you click on to follow a link. Most people use words like "click here" or other nebulous terms. If used correctly, anchor text can really increase your site traffic. First, anchor text should be descriptive as opposed to "page link" or something general. I recommend that you use your keywords. Where should you use anchor text? Anywhere. You can use it on your blog linking to other content on your site or someone else's. You can use it on other blogs linking to your site (this is preferred).
  6. Write good headlines: People judge a blog post by its headline, and when you're subscribed to a lot of blog feeds (as I am) you know that readers will pick and choose the blogs they read based on the titles. Don't make readers guess your topic, be specific and be benefit-driven.
  7. Time tip: I try to post by 7am EST (8am at the latest). Studies have shown that people have more time to read blogs and emails before 9am EST so complete all your posts by then.
  8. Bookmark your posts: Tag each of your blog posts with your keywords on social networking sites. You must create accounts for each of these first. Consider: digg.com, del.icio.us, yahoo.com, blinklist.com, spurl.com, reddit.com, furl.com, and stumbledupon.com.
  9. Analyze traffic: Google Analytics is the easiest to learn, manage and install. Monitor this data a few times a month to see where your traffic is coming from and whether your work to attract people to your site results in unique visitors.
  10. Picture this: Bring traffic to your blog with photos and images; people searching online for those images may be directed to your site.
One thing to remember: Nothing happens overnight, especially online. Some of the best and most solid traffic is built slowly over time. This doesn't mean that you won't see a spike, and in some cases even double or triple your current numbers, but solid ranking and searchability take time.

Saturday, September 17, 2011

50 Amazing CSS3 Animation Demos


CSS3 has brought some amazing new features. And the most fun is playing with the CSS animation. Here is a compilation of 50 CSS3 animation that allows you to perform many motion-based functions normally Delegated to JavaScript. In order to view this effect, you are required to have WebKit browsers like Safari and Chrome ( very sorry for the users of Internet Explorer )
50 Awesome Animations made with CSS3

1. CSS3 Clock With jQuery

Use the basic features of the CSS3 Transform: rotate. And the combination of javascript frameworks like jQuery can produce a cool CSS3 clock

2. Analogue Clock

Analogue clock created using webkit transition and transform CSS. JavaScript is only used to pull in the current time.

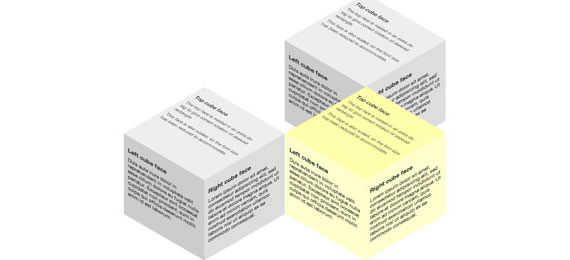
3. 3D Cube That Rotates Using Arrow Keys

You can Use up, down, left and right keys to navigate the 3D cube. 3D cube built using -webkit-perspective, -webkit-transform and -webkit-transition.

4. Multiple 3D Cubes (Slide In/Out)

Multiple 3D Cubes using CSS3 and proprietary ‘transform’ and ‘transition’ properties. I thought it was amazing, you can see the writing on the 3D object.

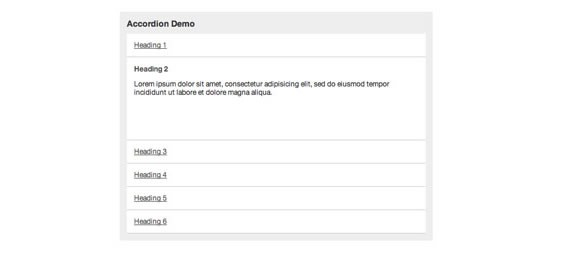
5. CSS3 Accordion

An accordion effect using only CSS. Proprietary animation in WebKit based browsers.

6. Auto-Scrolling Parallax

Auto-Scrolling Paralax is an animated parallax effect using WebKit’s CSS transition property,Auto-Scrolling Paralax no need JavaScript

7. Isocube

Isocube is like 3DCube but have litle different. Isocube can load images on one side

8. Image Gallery

9. Matrix

The Matrix is one of the best sci-fi films of all time. CSS3 capable of making such an amazing animated film made

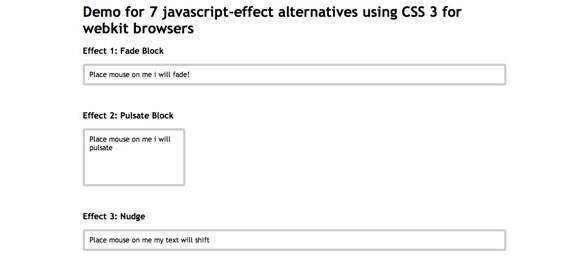
10. 7 Javascript-effect Alternatives Using CSS3

7 examples of alternatives to javascript effect by using CSS3. Various effects such as Fade Block, Block Pulsate, Nudge, Expand Block, Block Bounce, Spin Block and Accordion

11. Image Hover Effects

Image Hover Effects is an example of using CSS to replace the javascript. The image will shrink when you put your mouse pointer on top of it.

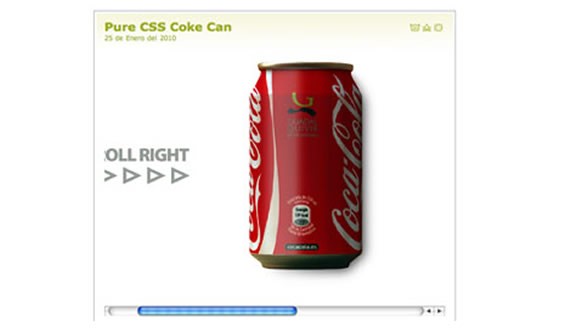
12. Turning Coke Can (Control With Scrollbar)

13. 3D Meninas

14. Polaroid Gallery

Polaroid Gallery is animated pile of photographs utilizing a ton of new CSS3 commands. It’s interesting when your mouse cursor is above the image, the image will enlarge

15. Space

16. Mac Dock

This list of links as the basis and change into an OS X icon dock of amazing.

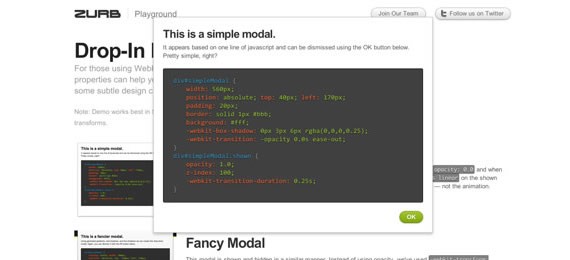
17. Drop-In Modals

With CSS3 effects and property Drop In Modals can help you make quick, animation, a simple change to using modals, and some subtle design cues.

18. Sliding Vinyl

Vinyl effect can be created by using CSS3 transition and a little HTML. This can make a standard album cover to have an interesting style

19. Zooming Polaroids

Polaroid is a picture that is in the box and spun like a pile of random photos that are sorting through CSS3 techniques. The text that comprises only extract the title and alt attribute

20. Animated Rocket

The principle of Animatid Roket is CSSEffect. The transformation changed the appearance of an element in the browser, moving, rotating, or other means. In determining the conversion of styles before making the application to happen so that you can not really animation.

21. Poster Circle

Poster Circle. is an animated spin column consists of a row of colored boxes and text are wonderful. The overall effect is crazy cool and undeniably dizzying

22. Morphing Cubes

Morphing Cubes will shows some of the more interesting content using 3D transformations, animations and transitions. Note that you can still select text in the element, even if the rotation. Converting elements are fully interactive.

23. Animated Polaroid Gallery

This is the example of other Polaroid Gallery. Piles of images at random and when the cursor hovers over an image, selected images will be enlarged

24. Spotlight Cast Shadow

When the cursor moves as if like a lamp spotlight leading up to the writing and cast

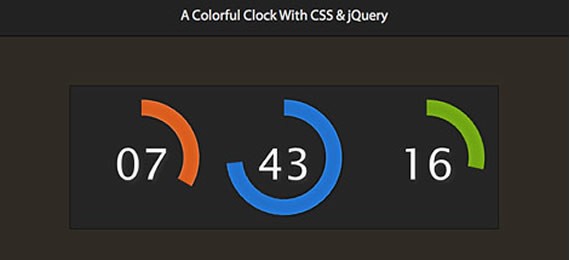
25. Colorful Clock

Colorful Clock is a colorful jQuery & CSS3 which will help you keep track of those precious last seconds of the year.


26. Lightbox Gallery

Lightbox Gallery is an awesome image gallery which leverages the latest CSS3 and jQuery techniques.Lightbox Gallery using jQuery, jQuery UI (for the drag and drop) and the fancybox jQuery plugin for the lightbox display in addition to PHP and CSS for interactivity and styling.

27. Elastic Thumbnail Menu

Elastic Thumbnail Menu is an alternative method for smoothing the menu, in particular by increasing the menu items when the mouse is hovering over the menu. And then expand to the top menu

28. Coverflow

This animation Apple style that combines CSS transformation and jqueryUI. This one truly animate between two half states, making a slider like iTunes

29. jQuery DJ Hero

DJ Hero This is one of the interesting combination of CSS3 with jquery. On-screen controls you can control the pace or just take enough to record your mouse

30. Dynamic Stacking Cards

inn is a dynamic stack of index cards that simply using HTML and CSS3 features such as change and transition (for the dynamic effects) and the @ font-face, box-shadow and border-radius (for styling).

31. Another Image Gallery

This is an example of another image gallery that uses CSS3 transforms property and property transitions.

32. Snow Stack (Control With Arrow Keys)

33. Animated Pricing Column

CSS3 animation can also be used in the package list price of a product. Animated Column Pricing can be applied properly there

34. Slick jQuery Menu

Slick Jquery Menu achieved through a combination of CSS3 and JQuery menu below is very elegant and shows some great use of Jquery and CSS3. This is just one of those crazy concepts that the test can be used in CSS3 will be true of the standard Web.

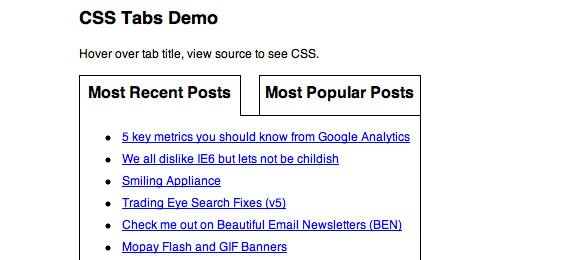
35. CSS Tabs Without Javascript

36. Tab Menus Without Javascript

37. SVG Fisheye Menu

CSS animation can animate almost any property on the item and do funny things, such as rotation and tilt. As proof,will created quick and dirty CSS3 Fisheye / Dock demo. Used as an added bonus, the demo-SVG in the tag IMG.

38. Falling Leaves

Like autumn. Animated falling leaves are made using CSS3

39. Rotating Gallery

Image Gallery Rotaitng build with CSS transform transition and CSS features. To see the effects of rotation, click the small image

40. Dropdown Menu

Dropdown Menu is a very nice navigation menu by using CSS3 transition property. CSS transitions are very strong influence to renounce the use of JavaScript for many common side effects.

41. Star Wars Crawl

Star Wars opening crawl, using only HTML & CSS. It only works in Snow Leopard in Safari 4.0.4 and the WebKit nightly.

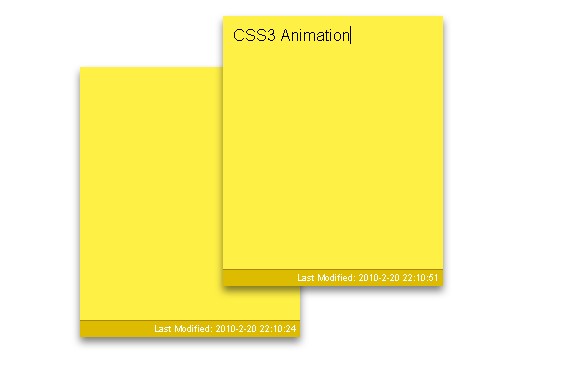
42. Sticky Notes

43. Snowflakes

44. Another Fisheye

This is another fisheye that using CSS3

45. Frame-by-Frame Animation

The first demonstration reqires you to keep clicking the image to see the next frame, and it wraps around to the start when you reach the last frame.The second demonstration just needs you to keep the mouse moving over the image in MOST browsers. But the BIG drawback to this method is that the speed of movement of the mouse governs the speed of animation

46. AT-AT Walker

AT-AT Walker is not flash but only CSS3. That amazing !

47. Another Accordion

48. Dynamic Presentation Without Flash

49. Smoothie Slider Menu

50. Spinner

This is basically like an ajax/loader spinner except its not a animated gif. It uses CSS3 to make it spin.